Reviews Widget
Overview
A high-impact, visually stunning review display widget that is proven to engage shoppers and increase conversions. Extensively customizable and optimized for page-load speed.
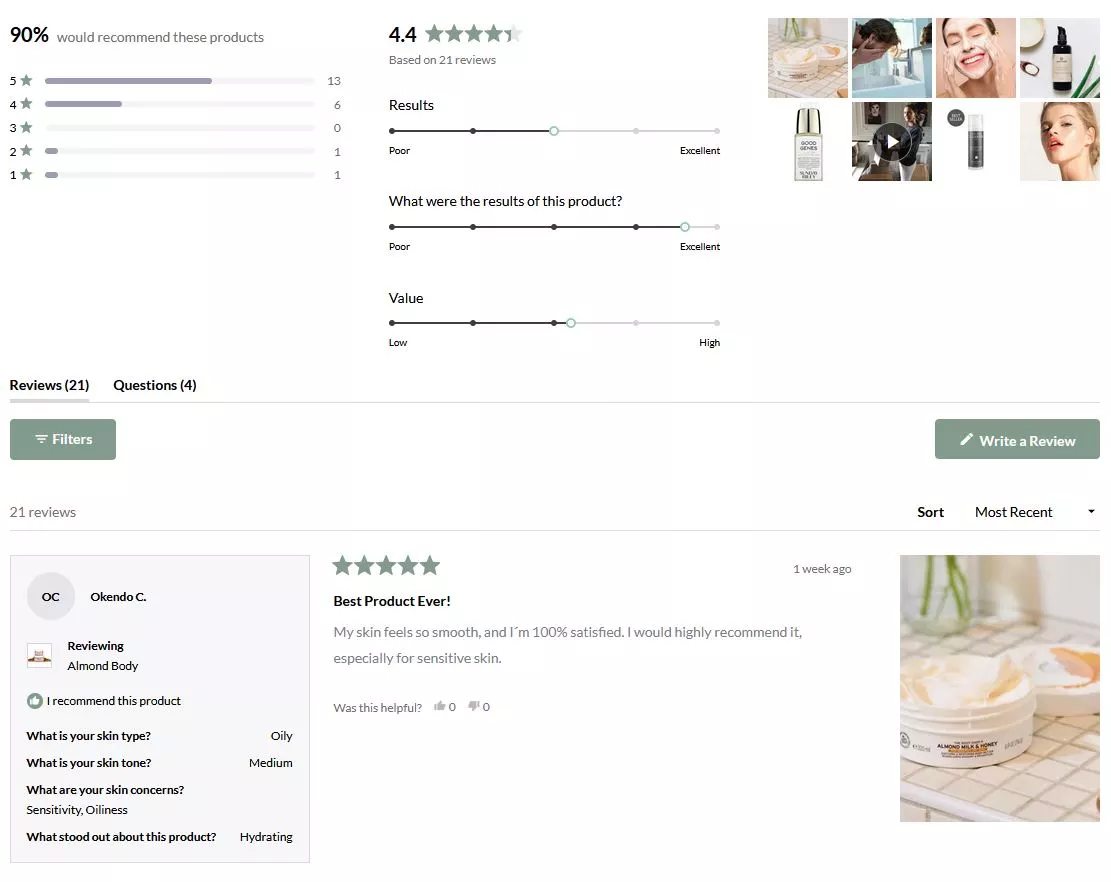
Installation
- Shopify Online Store 2.0
- Shopify Vintage Theme
Instructions for a Shopify Online Store 2.0 installation can be found here.
-
Create a new liquid snippet in the snippets folder with the following name:
snippets/okendo-reviews-widget.liquid -
Inside your newly created liquid file, add the following HTML snippet:
<div data-oke-widget></div> -
Customize your snippet with the data attributes listed here.
-
Copy the following snippet and place it in your Theme Code where you would like the widget to appear:
{% render 'okendo-reviews-widget', product: product %}
For more detailed instructions, read our help centre article.
Styling
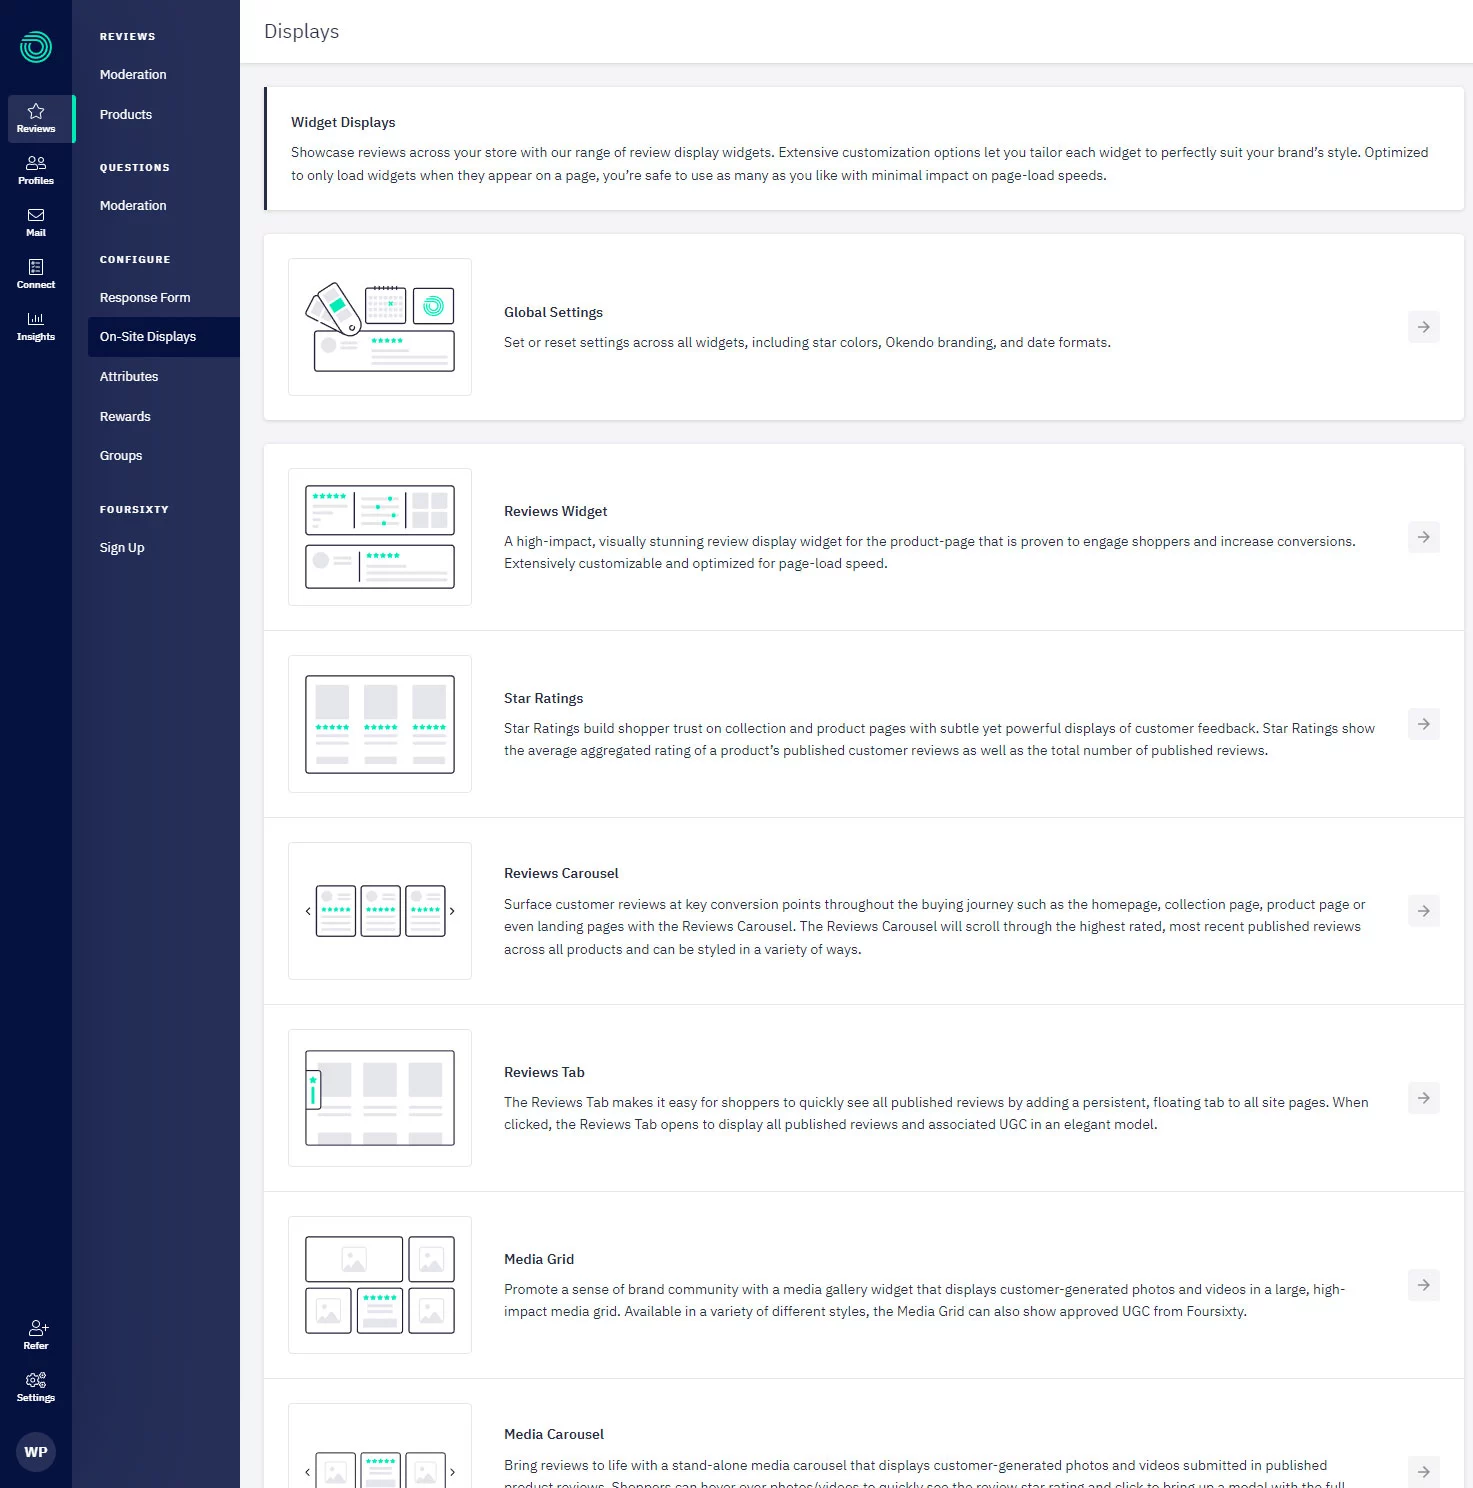
The preferred method of configuring the Reviews Widget is via the Okendo Admin which can be accessed in the Okendo app via Reviews -> On-Site Displays:
Data Attributes
Use these data attributes on the widget markup to customize its configuration. None of these attributes are required.
| Data Attribute | Description | Value Type | Supported Values |
|---|---|---|---|
data-oke-reviews-product-id | Used to specify a Shopify Product ID with the word shopify- in front of it. The reviews widget will only show reviews for the specified product. | string | Any valid product ID in the format shopify- e.g. shopify-1234567. |
data-oke-reviews-group-id | Used to specify an Okendo Group ID so that the reviews widget only shows reviews for the specified group of products. | string | Any valid product group ID in a GUID format e.g. 69d2e67d-b980-4333-97b7-30411807a7b1 |
data-oke-reviews-ask-question-product-id | Used to show the “Ask a Question” in the reviews widget to leave a question for the specified product. | string | Any valid product ID in the format shopify- e.g. shopify-1234567. |
data-oke-reviews-write-review-product-id | Used to show the “Write a Review” in the reviews widget to write a review for the specified product. | string | Any valid product ID in the format shopify- e.g. shopify-1234567. |
data-oke-order-by-tag-id | Used to sort the widget by a given featured tag id that has been exposed as a public tag. | string | A tag ID copied from the On Site Displays -> Reviews Widget -> Reviews List tag picker. See the section below for more details. |
Examples
Giving The Widget A Data Source
Without specifying a data source for the reviews, the widget will show all reviews for your store. You can provide either a Product ID or a Group ID to use that as the data source for the reviews.
Product Widget
<div data-oke-widget data-oke-reviews-product-id="shopify-<PRODUCT_ID>"></div>
The product widget also has some pre-rendered content stored in Shopify Metafields that we recommend including for increased performance on-site:
If you are using liquid use the following snippet:
<div data-oke-widget data-oke-reviews-product-id="shopify-{{ product.id }}">
    {{ product.metafields.okendo.ReviewsWidgetSnippet }}
</div>
The general format for other frameworks is:
<div data-oke-widget data-oke-reviews-product-id="shopify-<PRODUCT_ID>">
    <!-- Retrieve the product.metafields.okendo.ReviewsWidgetSnippet via Shopify's GraphQL/REST API and put the contents here -->
</div>
Grouped Widget
Learn more about Okendo Groups here:
If you are using liquid or general frameworks use the following snippet:
<div data-oke-widget data-oke-reviews-group-id="<GROUP_ID>"></div>
Group ID is found in the Okendo Admin URL for a given group as descibed in the table above.
Specifying a Product To Ask About
When the widget is in all-reviews or grouped mode an explicit Product ID is needed to show the "Write a Review" or "Ask a Question" buttons.
Write A Review Product ID
If you are using liquid use the following snippet:
<div data-oke-widget data-oke-reviews-write-review-product-id="shopify-{{ product.id }}"></div>
The general format for other frameworks is:
<div
    data-oke-widget
    data-oke-reviews-write-review-product-id="<PRODUCT_ID>"
></div>
Ask A Question Product ID
If you are using liquid use the following snippet:
<div data-oke-widget data-oke-reviews-ask-question-product-id="shopify-{{ product.id }}"></div>
The general format for other frameworks is:
<div
    data-oke-widget
    data-oke-reviews-ask-question-product-id="<PRODUCT_ID>"
></div>
Creating Curated Review Widgets Using Feature Tags
You can create multiple review widgets that display reviews curated by specific feature tags (for example, "Winter 2026", "Great for Layering", etc.).
1. Create and Assign a Review Tag
- Navigate to Reviews or Moderation.
- Open the review you want to feature.
- Create a new tag (for example,
Winter 2026). - Assign the tag to the review.
Tags created in Reviews/Moderation are private by default and cannot be used by storefront widgets until they are exposed publicly.
2. Make the Tag Public
- Navigate to On-Site Displays.
- Open the Reviews Widget you want to configure.
- Locate the Featured Reviews / Feature Tags configuration.
- Add the tag name (
Winter 2026) to the list. - Save the widget configuration.
This action exposes the tag publicly and generates a Tag ID.
- Copy the generated Tag ID.
3. Add a Curated Reviews Widget
Add a Reviews Widget to your storefront (for example, using a Shopify Custom Liquid section).
Example:
<div
  data-oke-widget
  data-oke-reviews-product-id="{{ product.id }}"
  data-oke-order-by-tag-id="PLWTGAF">
</div>
Replace:
{{ product.id }}with the target product ID (or your existing product widget configuration).PLWTGAFwith the public Tag ID copied from the Reviews Widget settings.
4. Publish and Verify
- Save and publish your theme changes.
- Load the storefront page containing the widget.
- Confirm that reviews tagged with the specified feature tag appear first in the widget.
Newly exposed tags may take a short period of time to propagate through the system before all tag-related UI elements appear.
If you are using liquid use the following snippet:
<div data-oke-widget data-oke-reviews-product-id="shopify-{{ product.id }}" data-oke-order-by-tag-id="<THE TAG ID COPIED FROM OKENDO ADMIN>">
    {{ product.metafields.okendo.ReviewsWidgetSnippet }}
</div>
